

Trimming your dog’s nails at home saves money, strengthens trust, and keeps your dog’s paws in good shape. But it is one of those tasks that makes even experienced dog owners nervous. Clip too short and you hit the quick, causing pain and bleeding. Clip too rarely and overgrown nails start to affect your dog’s gait, posture, and joint health over time.
Table of Contents
This guide covers everything you need to do it safely: the right tools, how to read a nail before you cut, a clear step-by-step process, black nail tips, dewclaw care, and what to do when something goes wrong. Whether you are anxious about your dog’s stress response check our guide on signs your dog is stressed or anxious to know what to watch for or you simply want more confidence with the clippers, you are in the right place.
| To trim your dog’s nails at home safely, use sharp dog-specific clippers or a nail grinder, cut only the tip of the nail at a 45-degree angle, and avoid the quick the blood vessel inside. For light nails, the quick appears pink. For black nails, cut in small increments and stop when you see a dark grey dot appear in the centre of the cut surface. Keep styptic powder nearby in case you nick the quick. Trim every 3 to 4 weeks for indoor dogs and every 6 to 8 weeks for dogs that walk regularly on concrete. |
Why Nail Length Actually Matters
Most dog owners trim nails for aesthetic reasons or because they are scratching the floors. The real reason to stay on top of it is structural. When a dog’s nails are too long, they contact the ground with every step, pushing the toe joints upward. Over months and years, this creates chronic pressure on the paw, alters your dog’s stance, and contributes to pain in the toes, wrists, and even the spine.
The easy test: when your dog is standing on a flat surface, their nails should not touch the floor. If you can hear clicking when they walk across tile or hardwood, the nails are past due.
Long nails also snag on carpet and fabric, which can cause a painful tear. The dewclaw the nail on the inner thumb position of the paw is the most commonly neglected. Unlike the other nails, it never touches the ground and grows in a curve that can eventually curl back into the skin if left untrimmed.
Choosing the Right Tool
There is no universal best clipper. It depends on your dog’s size, nail thickness, and temperament. Here is how the main options compare:
| Tool Type | Best For | Pros | Watch Out For |
| Scissor-style clippers | Small and medium breeds | Precise control, quiet | Can crush thick nails |
| Guillotine clippers | Medium and large breeds | Clean cut on thick nails | Blade dulls faster |
| Nail grinder / Dremel | Anxious dogs, dark nails | No sharp edges, gradual | Heat build-up, noise and vibration |
| Nail file | Puppies, tiny breeds | Safest option | Slow, not for long nails |
For most medium to large dogs: guillotine-style or scissor-style clippers work best. For nervous dogs or those with very dark nails, a grinder gives you more control because you are removing small amounts at a time. You will also want styptic powder (Kwik-Stop is the most common brand), sharp lighting, a non-slip mat, and high-value treats.
One thing worth buying even if you already have clippers is a nail file or emery board. Running it along the cut edge after trimming prevents sharp corners that snag on fabric or scratch skin.
Understanding the Quick and How to Find It
The quick is the blood vessel and nerve bundle that runs through the centre of the nail. Cutting into it causes immediate pain and bleeding not dangerous, but unpleasant for your dog and a setback for future grooming sessions.
On light-coloured nails: the quick is visible as a pink shadow inside the nail. You can see clearly where it ends. Leave at least 2mm of white nail beyond the quick.
On black or dark nails: you cannot see the quick directly. The technique is to cut in very small increments 1 to 2mm at a time and look at the cut surface after each clip. At first the centre will look white or chalky. When you see a small dark grey or black dot appear in the centre, stop immediately. That dot is the edge of the quick.
With practice, you will also start to notice the nail tapering and narrowing as you approach the quick. That is your secondary signal to stop.
How to Trim Dog Nails at Home: Step by Step
Step 1: Tire your dog out first
A dog that just finished a 20-minute walk or play session is significantly calmer than one with pent-up energy. Nail trimming sessions go far better when your dog is in a relaxed state. Some owners do it right before a meal, using the anticipation of food as an additional motivator for good behaviour.
- Take a short walk or play session beforehand
- Let your dog settle for 5 to 10 minutes before you begin
- Choose a quiet room with no distractions
- Keep sessions short — 4 paws in one go is ideal, but 1 to 2 paws counts as a win for nervous dogs
Step 2: Get into the right position
Your positioning matters more than most guides acknowledge. A dog that cannot see what you are doing becomes more anxious, and one that can easily pull their paw away will keep doing it.
- For small dogs: place them on a table at waist height, or hold them in your lap facing away from you
- For large dogs: sit on the floor, guide your dog to lie on their side, and work from behind
- Drape your arm gently over their body to discourage squirming without restraining them forcefully
- Never hold the paw in the air for extended periods it is uncomfortable and increases resistance
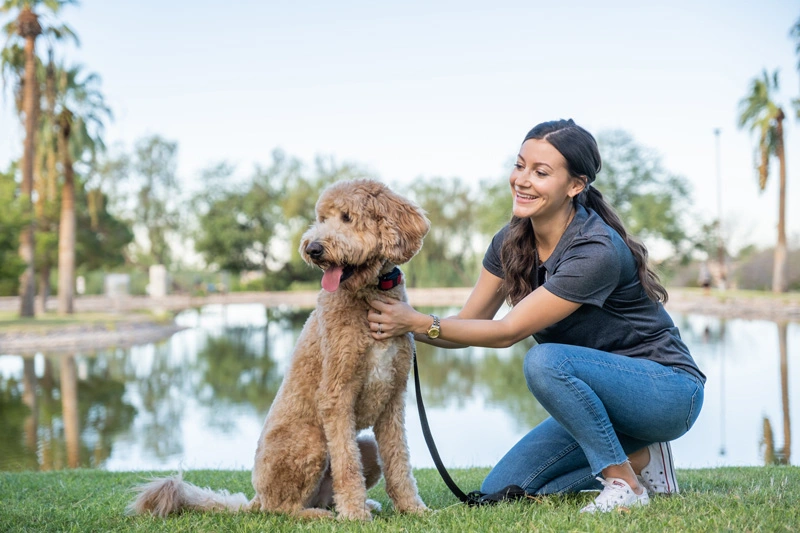
Step 3: Handle paws before picking up the clippers
If your dog is new to nail trimming or had a bad experience before spend the first two to three sessions just touching and handling the paws with treats as rewards. Do not even bring out the clippers. This step is often skipped but it is the difference between a dog that tolerates grooming and one that turns it into a wrestling match. If your dog already shows anxiety around new experiences, read our article on how to socialize a puppy with other dogs for the same graduated approach applied to handling.
- Touch paw, give treat, repeat
- Pick up the clippers, show them to your dog, put them down again, give treat
- Click the clippers near but not on the paw, give treat
- Only when your dog is relaxed through all of the above, begin trimming
Step 4: Extend the nail and position the clipper
Hold the paw firmly but gently. Use your thumb to push back any fur covering the nail, and press the toe pad with your thumb to extend the nail forward. This gives you a clear view and steadies the digit.
- Hold the clipper perpendicular to the nail for a straight-across cut, or at a slight 45-degree angle
- For scissor clippers: blades horizontal, nail between the blades
- For guillotine clippers: insert the nail tip through the opening, cutting edge toward the floor
- Confirm you are cutting the tip only at least 2mm from where the quick ends
Step 5: Cut cleanly and check the surface
Squeeze the handles in one smooth, confident motion. Hesitating causes the blades to crush rather than cut cleanly, which is painful and more likely to crack the nail. After each cut, look at the cut surface.
- White or chalky centre: you are safe to trim a little more if needed
- Small dark grey dot in the centre: stop you are at the edge of the quick
- Any pink or red: you have nicked the quick apply styptic powder immediately
- Smooth out rough edges with a nail file after each nail
Step 6: Do not forget the dewclaw
The dewclaw sits higher on the inner side of the front leg. Some breeds also have rear dewclaws. It never touches the ground, so it grows faster and in a curve.
Finding it: run your finger up the inside of the front leg, just above the paw. You will feel a small nail on a small digit that does not make contact with the floor.
- Trim the dewclaw every 3 to 4 weeks regardless of what the other nails look like
- It curves as it grows identify the quick before cutting
- Use the same technique as regular nails: small cuts, check the cross-section
- If the dewclaw appears to be growing into the skin, see a vet rather than trimming at home
How Often to Trim Based on Lifestyle
How quickly nails grow depends on diet, genetics, and how much natural wear they get. You can read more about how nutrition affects your dog’s body in our guide on what do dogs eat and nutrition basics. Use the table below as a starting point and adjust based on what you observe.
| Dog Lifestyle | Trim Frequency | Why |
| Mostly indoor / soft surfaces | Every 3 to 4 weeks | Nails grow fast with no natural wear |
| Daily walks on pavement | Every 6 to 8 weeks | Concrete naturally files nails down |
| Mix of both | Every 4 to 6 weeks | Check monthly and trim as needed |
| Dewclaw (all dogs) | Every 3 to 4 weeks | Never touches the ground, grows fastest |
Trimming Black Dog Nails: The Grey Dot Method
Black nails are intimidating because you cannot see the quick before you cut. The grey dot method takes the guesswork out of it:
- Cut 1: Cut a thin slice from the very tip of the nail. Look at the cut surface.
- What you see: Dry, chalky white or grey continue.
- Cut 2 to 3: Take 1 to 2 more small slices. Check after each one.
- Stop signal: A dark grey or black oval dot appears in the centre of the cut surface. This is the pulp chamber just before the quick. Stop here.
Many owners are surprised at how little they trim before seeing the dot on some nails, and how much more they can take off on others. Individual nails on the same dog vary. Always check after every cut.
Pro tip: if you are genuinely unable to determine where to stop on black nails, ask your vet or groomer to walk you through one paw in person. Seeing it done once in real life is worth more than a hundred written guides.
What to Do When Your Dog Will Not Let You Trim Their Nails
Resistance is normal, especially for dogs who have had a bad experience or were never conditioned to nail handling. If your dog already shows signs of anxiety during grooming tasks, our post on signs your dog is stressed or anxious will help you read their body language before and during a trim session.
For dogs that fuss or pull paws back
- Do not power through stopping and trying again in a few minutes is better than a struggle
- Use a licki mat or snuffle mat smeared with peanut butter or wet food to occupy them
- Trim one nail per session if that is all they will allow progress over weeks is fine
- Try sitting on the floor with your dog between your legs, their back to your chest
For dogs with strong clipper aversion
- Switch to a grinder the gradual vibration and absence of the crunch is less threatening for many dogs
- Start with a completely different room and routine to reset the association
- Pair every exposure to the tool with a high-value treat over 2 to 3 weeks before attempting to trim
- Consider a force-free trainer for extreme fear. The same positive reinforcement principles used in training your dog to walk nicely on a collar apply directly to nail handling desensitisation.
If You Cut the Quick: Exactly What to Do
Cutting the quick is common even experienced groomers do it occasionally. It looks alarming because blood is bright red against the nail, but it is rarely serious.
- Stay calm your dog will take their cue from you
- Apply styptic powder directly to the tip of the bleeding nail and press gently for 30 seconds
- No styptic powder? Cornstarch works. Bar soap pressed against the tip can also slow bleeding
- Do not wash the nail immediately water keeps blood from clotting
- Give your dog a high-value treat and end the session the session is over for today
- Check the nail after 10 minutes to confirm bleeding has stopped
When to call a vet: if bleeding does not stop after 15 to 20 minutes of direct pressure, or if your dog is severely limping afterward, call your vet. In most cases a nicked quick heals quickly on its own.
Breed-Specific Considerations
Not all dogs have the same nail anatomy or grooming tolerance. These are the breed characteristics worth knowing before you start.
Large breeds such as Labs, German Shepherds, and Rottweilers
Thick, hard nails require sharp, heavy-duty guillotine or scissor clippers. The quick tends to run further down the nail. Take more, smaller increments rather than trying to cut in one go.
- Use guillotine-style clippers for thick nails
- Replace clipper blades every 6 to 12 months dull blades crush nails
- Two-person sessions work well for large breeds that are difficult to position
- Consider a professional grinder setup for dogs over 30kg
Small breeds such as Chihuahuas, Yorkshire Terriers, and Maltese
Tiny nails require small, precision clippers. The quick is proportionally larger relative to nail size, so be conservative.
- Use small-format scissor clippers or a fine nail file
- Hold small paws firmly the smaller surface area makes them harder to grip
- Go slowly; tiny nails have a shorter margin before you hit the quick
- Weekly filing is often enough to maintain length without formal trimming
Breeds with double dewclaws such as the Great Pyrenees
These breeds have two dewclaws on the rear legs, often loosely attached. They require careful, frequent trimming.
- Inspect double dewclaws every 2 to 3 weeks
- Trim each dewclaw individually they often grow at different angles
- Never remove double dewclaws without veterinary guidance; in some breeds they are functionally attached
- If the dewclaw appears to be twisting or growing sideways, have a vet check it
Building a Full Grooming Routine Around Nail Care
Nail trimming works best as part of a broader grooming routine rather than a standalone event. If you already bath your dog regularly and do weekly coat brushing, adding nail trimming to that schedule makes it feel routine for your dog. Pairing tasks consistently bath, brush, nails builds a positive association over time. Keeping up with dental hygiene works the same way. Our guide on how to clean your dog’s teeth at home covers the full process and is a natural companion task to nail trimming — both are at-home care wins that reduce vet visits. For a deeper look at the nine easiest ways to cover dog dental care, check dog dental care at home as well.
Frequently Asked Questions
How short should I cut my dog’s nails?
Nails should be cut to the point where they sit just above the floor when the dog is standing. For light nails, cut to within 2mm of where the pink quick ends. For dark nails, use the grey dot method and stop as soon as the dark oval appears in the centre of the cut surface.
What if I cannot see the quick in dark nails?
You will not be able to see it before you cut. Cut in 1mm increments and examine the cut surface after each clip. Stop when you see a dark grey dot appear in the centre. That is your signal that you are approaching the quick.
How do I cut my dog’s nails at home with a nail cutter if they are very thick?
For very thick nails, use heavy-duty guillotine clippers. Make sure the blade is sharp a dull blade will crush and split the nail rather than cutting cleanly. Cut at a 45-degree angle in small stages rather than trying to get through it in one squeeze. A nail grinder is also a good alternative for thick nails, as it avoids the compression force of clipping entirely.
How often should I trim my dog’s nails?
Indoor dogs or those that walk mostly on soft surfaces need trimming every 3 to 4 weeks. Dogs that walk daily on concrete may only need trimming every 6 to 8 weeks. The dewclaw which never touches the ground should be trimmed every 3 to 4 weeks regardless.
What do I do if my dog bleeds when I cut their nail?
Apply styptic powder or cornstarch directly to the nail tip and press gently for 30 seconds. Avoid washing the nail for 10 to 15 minutes. Stay calm, give your dog a treat, and end the session. Check in 10 minutes to confirm the bleeding has stopped. Contact your vet only if bleeding continues beyond 15 to 20 minutes.
Is it better to use a grinder or clippers for dogs?
It depends on your dog. Clippers are faster, quieter, and easier for most dogs. Grinders give more control, produce no sharp edges, and work better for thick or dark nails. If your dog panics at the sound of clippers, try a grinder. If the vibration bothers them, stick with clippers.